Platoon
4.1+ Scenarios where the human user controls a platoon.
28 files
-
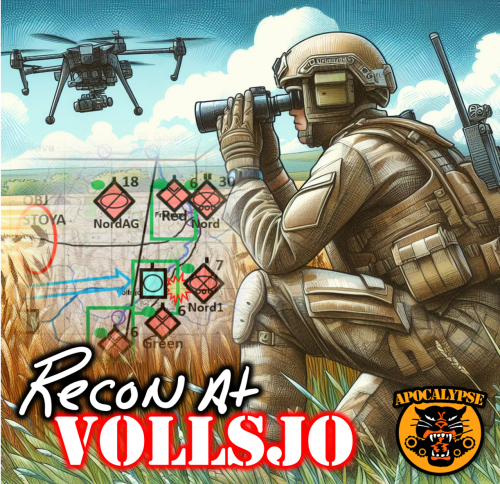
Recon At Vollsjo
This is part of an ongoing Steel Beasts campaign with Loscon Heavy Industries
Recon at Vollsjo
by Apocalypse
Situation
Torrike forces have continued their attack into the area and it must be stopped!
Torrike forces have moved an advanced guard force into the area which consists of a mechanized infantry company (3x Platoons of BMP-2) an understrength Tank Company (6x T72B3), and a recon platoon (3x BMP2/Infantry). We expect their tank company to be set somewhere west of Vollsjo with supporting mechanized infantry platoons defending the area, and reconnaissance vehicles forward of the river. We expect mounted observation posts with 3-man recon patrols west of the river.
Your scout platoon is on point for the 28th Brigade- we have a friendly tank company nearby ready to strike against the Torrike advanced guard but you must provide a recommendation for which axis our tankers can advance across. You have 90 minutes to conduct a reconnaissance of the area - determine the BEST approach for our tanks so that they can destroy the enemy tank company and force a withdrawal of the advanced guard - this may halt the entire Torrike offensive in the area! We have 90 minutes to force the Torrike Advanced Guard from the area before they reinforce with the intent to continue their attack.
Our artillery batteries are falling back and you have no support for this mission.
You have 4x 2-man recon teams within the platoon that are equipped with 1x Spike SR, 1x Quadcopter, and JIM thermal imagers.
Your vehicles are equipped with medium-range radios - if the vehicles are destroyed then you will be unable to communicate your recommendation to our friendly tanks.
Use Triggers 1, 2, and 3 to recommend a route to the tanks.
Mission Failure If:
a. Loss of Scout Vehicles before you make the radio call to D-1 (no radios = no call)
b. No decision in 90 minutes
c. D-1 becomes inop and cannot destroy the enemy tanks (pick the best route!)
The enemy forces array in this scenario is randomized for re-playability
70 downloads
- luchs
- reconnaissance
- (and 1 more)
(0 reviews)0 comments
Submitted
-

DEFENSE OF PUERTO NATALES
By Connaugh
DEFENSE OF PUERTO NATALES: OPERATION SOBERANIA II
By Connaugh
Operación Soberanía (Operation Sovereignty) was a planned Argentine military invasion of Chile due to the Beagle conflict.
The invasion was initiated on 22 December 1978 but was halted after a few hours and Argentine forces retreated from the conflict zone without a fight.
The Fifth Army Corps was to seize Puerto Natales, the largest of two cities of the Chilean Magallanes Region.
SITUATION:
Argentina's present government has made plans to initiate Operation Soberania II and capture Puerto Natales.
EXECUTION:
The Chilean 25th Mechanized Infantry is to defend the border crossings at Cerro Dorotea and Casas Viejas.
The 5th Armored Brigade is to advance from Punta Arenas to defend the city of Puerto Natales.
FORCES:
Chilean Forces:
5th Armored Brigade 4 x Leopard 2A4
3 x M113A1 with Infantry and Anti-Tank Weapons.
25th Mechanized Infantry 2 x Leopard 2A4 Tanks
Infantry with Anti-Tank Weapons.
Argentina Forces include TAM VC Tanks and TAM VCTP Infantry Fighting Vehicles.
Scenario ends when either Puerto Natales is captured or all enemy AFV's are non-operational.
Scenario takes 25 minutes to play.
Map embedded in Scenario.
38 downloads
(1 review)0 comments
Submitted
-

The Defense of Neutral Moresnet
By Connaugh
The Defense of Neutral Moresnet
By Connaugh
Neutral Moresnet was a small Belgian–Prussian condominium in western Europe that existed from 1816 to 1920 and was administered jointly by the United Kingdom of the Netherlands and the Kingdom of Prussia. It was 1.5 kilometers (1 mi) wide and five kilometers (3 mi) long. After 1830, the territory's northernmost border point at Vaalserberg connected it to a quadripoint shared additionally with the Dutch Province of Limburg, the Prussian Rhine Province, and the Belgian Liège Province. When Belgium gained its independence from the Netherlands in 1830, the Belgians assumed control of the Dutch role in Neutral Moresnet (though the Dutch never formally ceded their claim).
SITUATION:
The Irredentist Party has gained control of the government of the Netherlands and has ordered its Armored Forces to invade Neutral Moresnet and acquire it by force with the expectation that the international community will grant the Netherlands “de facto” ownership. The government of Belgium strongly protests this action.
EXECUTION:
Belgian Forces (1/3 Lancers) are to advance into Neutral Moresnet to defend the town of Kelmis from capture.
FORCES:
Belgium: Leopard 1A5 x 4
Piranha-IIIC x 4 (with Spike Anti-Tank Missile Teams)
Netherlands Forces include Leopard 2A6 tanks and CV90/35-NL PC’s.
Scenario ends when all enemy AFV’s are not operational or Kelmis is captured.
Scenario takes about 20 minutes to play.
59 downloads
(0 reviews)0 comments
Updated
-
Zone Recon - European Farmland (4.379)
By ben
Command a Leopard 2A6 Platoon in a reconnaissance mission to locate the lead elements of a Russian Tank Battalion.
Your equipment: Leo2A6, Boxer, infantry, MB300 SpikeLR, scouts.
Enemy equipment: T72B3, BMP2, Tigr.
Time limit 1 hour.
246 downloads
-

Hasty defence on the Crossroads
By Maic
Fight a hasty defence against a reinforced Russian tank company in semi forested terrain.
Its pretty much just your platoon against a overwhelming force. Can you do it?
Map info:
Replaced the Kouvostoliitto map with its original version:
Kouvostoliitto, UID:
41537f18-8f1f-4f1c-bc2a-60dfd1e4cd62
193 downloads
-

Desert Skirmish - CV90 (4.379)
By ben
Lead a CV90 Mechanized Infantry Platoon dawn attack to clear a remote valley.
Your equipment: CV90/30Fi, Infantry, Milan, Dingo+RWS, Scouts, Quadcopter UAV.
Enemy equipment: Infantry, BTR70, BMP1, BRDM2, ZSU23-2, T55A.
Time limit 2 hours.
Uses the following map (available for automatic download from Map Server)
https://www.steelbeasts.com/files/file/3122-african-desert-map-ft-polk-heightmap/
210 downloads
(2 reviews)0 comments
Updated
-

GIBRALTAR – THE RECONQUISTA
By Connaugh
GIBRALTAR – THE RECONQUISTA
By Connaugh
SITUATION:
Spain claims Gibraltar, a 6-square-kilometre Overseas Territory of the United Kingdom in the southernmost part of the Iberian Peninsula. Then a Spanish town, it was conquered by an Anglo-Dutch force in 1704 during the War of the Spanish Succession on behalf of Archduke Charles, pretender to the Spanish throne.
The legal situation concerning Gibraltar was settled in 1713 by the Treaty of Utrecht, in which Spain ceded the territory in perpetuity to the British Crown stating that, should the British abandon this post, it would be offered to Spain first. Since the 1940s Spain has called for the return of Gibraltar.
Spain has now ordered its Armored Forces to cross the border and take possession of Gibraltar.
EXECUTION:
The Extremadura and Cantabria Brigades are to capture the following objectives and defend Gibraltar from any attempt of the UK to retake the peninsula:
Airport
Terminal
Town
Gun Batteries
Lighthouse
FORCES:
1/Extremadura 3 x Leopard 2A5 Tanks
2/Extremadura 3 x Leopard 2A5 Tanks
1/Cantabria 3 x Pizarro F1 IFV
2/Cantabria 3 x Pizarro F1 IFV
U.K. Garrison Forces are reported to have Chieftain Tanks and Infantry with Anti-Tank weapons.
A message will be generated when an objective is captured.
Mech Infantry must be used to capture an objective.
Scenario takes approximately 45 minutes to play.
Unzip GIBRALTAR – THE RECONQUISTA and save in your Scenario Folder
Unzip CONNAUGH – GIBRALTAR A and save in your Maps Folder
154 downloads
(0 reviews)0 comments
Updated
-

Counterattack At Al Miram
Counterattack At Al Miram
by Apocalypse
I. Situation.
We have detected an enemy attack to seize crossings at the Jahj Canal in an attempt to break out of Al Miram. Your scout platoon is currently positioned near Hill 138, with dismounted positions established at OPs ALPHA & BRAVO. We observed an enemy armor platoon preparing for the attack but lost contact after our drone was shot down by a Surface to Air missile somewhere near Al Miram. We are dispatching friendly armor reinforcements but they will take approximately 15 minutes to arrive. In the meantime, we have dispatched a flight of AH64's that will arrive in 10 minutes.
Insurgent forces also control the village of Al Miram. The presence of Surface to Air missiles has made aerial reconnaissance difficult, and their exact composition is unknown. However, based on Human Intelligence reports we can estimate at least one platoon of T-55 tanks reinforced with infantry is defending the village.
II. Mission. Defend against enemy attacks along the Jahj Canal and then counterattack to clear Al Miram.
III. Execution. A flight of (2) AH64's is en route and will arrive within 10 minutes. Friendly armor is also en route and will arrive in 15 minutes. Hold positions along the Jahj Canal at OP ALPHA & BRAVO and then counter-attack to clear the village of Al Miram.
a. Fires. You have two 120mm Mortars and a platoon of 155mm directly supporting you.
b. Aviation. 2x AH64's will arrive in 10 minutes. A UAV was shot down recently and there IS a SAM threat in the village.
c. Engineers. No engineer support is available, however, a small minefield has been established near OP BRAVO.
IV. Service & Support. Logistics support is currently out of range. All forces are fully equipped and supplied. Resupply will be conducted following this operation
V. Command & Signal
a. Friendly ID: On
b. Overhead View: On
c. Map Updates: Enabled
238 downloads
(0 reviews)0 comments
Submitted
-

Finnish Mechanised Battlegroup - attack
By Maic
Play as Leopard 2A6 platoon leader as part of Finnish Mechanised Battlegroup.
Fight a meeting engagement with Russian mechanised battalion in semi forested terrain.
Platoon sized mission Perfect for single player or co-op.
Enemy: T-72b3, BMP-2
Friendly: Leopard 2A6, CV9030-FIN
difficulty: medium / hard
The terrain can be restricting and the battle position not the greatest, its Finland after all...
if you're having trouble opening the scenario use the mission editor to 'replace' the map. Search for map Kouvostoliitto.
You may have different version of the map on your system, but the scenario should work with it as well.
In case what's listed above doesnt work and you dont have the map, download it below and then do the replacing process.
MAP UID:
8baa3d95-7289-4af4-8548-a7346a2ad505
Map as as .rar file in case you dont have it, extract it wherever your maps folder is located, usually
C:\ProgramData\eSim Games\Steel Beasts\maps\packages
Kouvostoliitto Finland 50x50km.rar
310 downloads
-

MITLA PASS – SUEZ CRISIS 1956
By Connaugh
MITLA PASS – SUEZ CRISIS 1956
By Connaugh
SITUATION:
On 26 July 1956, Nasser nationalised the Suez Canal. On 29 October, Israel invaded the Egyptian Sinai. The IDF chief of staff, General Moshe Dayan, first planned to block the vital Mitla Pass. Dayan planned for the Battalion 890 of the Paratroop Brigade to drop near one of the defiles of the pass, Jebel Heitan. The rest of the brigade, under the command of Colonel Ariel Sharon would then advance to meet with the battalion, and consolidate their holdings.
MISSION:
The Paratrooper Force is to land near the Heitan Defile and capture it. 202 Brigade will advance and secure the Mitla Defile and hold it against any Egyptian Counterattacks.
EXECUTION:
Paratroopers are to land on either side of the Heitan Defile and maneuver their LMG and infantry teams to clear the Egyptian trenches.
After the Heitan Defile is captured, 202 Brigade will arrive and the tank platoon is to capture the Mitla Defile. The PC platoon is to set up infantry and ATGM teams for defense.
FORCE COMPOSITION:
Paratroopers 1 Infantry Platoon with LMG teams.
202 Brigade 3 x Shot Kal Tanks
4 x ASLAV PC’s with Dragon ATGM teams
Egyptian Force consists of T-55A tanks and BTR-50PK PC’s.
Mission Score dependent on capturing the Heitan Defile, the Mitla Defile
And destroying all Egyptian AFV’s.
Message will be generated when objective is captured.
Scenario takes about 35 minutes to play.
Unzip MITLA PASS – SUEZ CRISIS 1956 and save in your Scenarios Folder
Unzip CONNAUGH – MITLA and save in your Maps Folder.
234 downloads
-

Tank Platoon: Attack
By Mirzayev
This is the second in a series of scenarios designed to familiarize new Steel Beasts players with basic Offense and Defense tasks executed by a Tank Platoon. This series uses US Army Doctrine as a basis, and aims to present the Tank Platoon's role when operating as part of an Armor Company. This series also focuses on introducing concepts within the game to the player, while maintaining a low level of difficulty to reduce frustration during the learning process.
An attack is an offensive task that destroys or defeats enemy forces, seizes and secures terrain, or both. An attack differs from a movement to contact because enemy main body dispositions are at least partially known, allowing the leader to achieve greater synchronization. Attacks incorporate coordinated movement supported by direct and indirect fires. They may be hasty or deliberate, depending upon the time available for assessing the situation, planning, and preparing. The leader may decide to conduct an attack using only fires. (ATP 3-20.15, Tank Platoon)
This scenario has been designed to allow the practice of the following eight (8x) concepts:
i. Conduct a forward passage of lines with a unit in contact.
ii. Control direct fire through the use of fire control settings.
iii. Conduct movement and maneuver through restricted terrain.
iv. Employment of smoke to deny enemy observation and fields of fire.
v. Conducting an attack by fire.
vi. Conducting an attack to seize an objective.
vii. Attacking infantry in fortifications.
viii. Anticipating and defeating an enemy counter-attack.
This scenario is rated by the author as very easy, and will likely take approximately thirty-five (35x) minutes to complete.
This scenario heavily favors friendly forces to facilitate a learning environment where tactical mistakes do not mean instant death. AVEPS have been included as a method for identifying tactical errors made by the player(s) by sorting through events during the AAR.
Special thanks to ben, and Apocalypse for testing and providing feedback.
458 downloads
- beginner
- new player
- (and 5 more)
-
Camp Hornfelt (1-7) Updated for 4.3
By jas4500
All credit goes to GaryOwen for making these fantastic tutorial scenarios.
When I was figuring out how to learn Steel Beasts a few months ago, a lot of resources including the Steel Beasts Wiki suggested checking out these scenarios. I found them really helpful for learning basic tank platoon tactics. However during my play through I did notice some of the scenarios had some bugs and incorrect logic, probably due to the fact that these scenarios were made with a much older version of Steel Beasts. Also it requires beginners to learn how to convert and export old terrain packages which can be cumbersome for beginners. A converted version of the Blauheim terrain package is included.
A complete changelog can be found in the readme file
322 downloads
-
 (2 reviews)
0 comments
Submitted
-
Smash & Crush (4.268)
By ben
Command a 1985 US Tank Platoon as part of a Company hasty defense against an East German Tank battalion attack.
Your equipment: M1A1
Enemy equipment: T72A, BMP2, BRDM2, PT76, ZSU23-4.
Time frame 10 to 15 minutes.
272 downloads
-
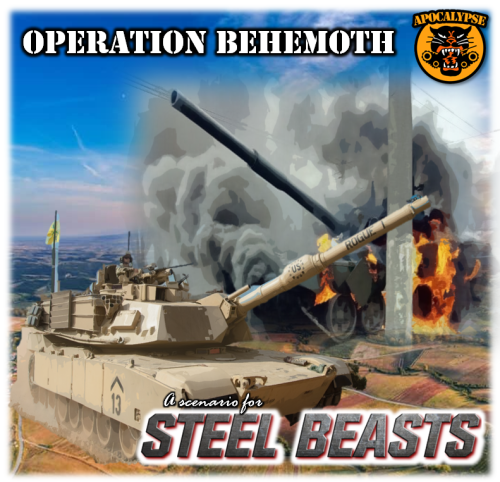
Operation Behemoth
Operation Behemoth
by Apocalypse
I. Situation. Enemy forces are defending the high ground in vicinity of OB TAURUS and BULL. We expect a light infantry Company defending the hills near OBJ TAURUS with a company of T-90s defending the intersection in vicinity of OBJ BULL, and enemy scouts defending the flanks. Friendly forces are arrayed south of PL BRONZE, with your platoon positioned along the eastern flank.
II. Mission. Attack to destroy enemy armor in vicinity OBJ BULL to enable C CO attack on OBJ TAURUS.
III. Execution.
a. Concept. Elements of E and D Companies will attack to destroy enemy forces on OBJ BULL. E1 (you) and D1 will attack while D2 establishes an attack by fire position on the high ground to your east. Once OBJ BULL is cleared of enemy armor, call C CO to begin their attack to seize OBJ TAURUS.
b. Fires.
1. 4x 120mm Mortars are available to support your movement.
2. Air sorties will conduct attacks on OBJ TAURUS (You do not control)
IV. Service & Support. No change. All elements are 100% on fuel and ammunition
V. Signals
Friendly ID: On
Observer View: On
Map Contacts: Enabled
Triggers
1) D CO Support Elements move into position
2) C CO begins their assault on OBJ TAURUS
Scoring
Victory 75pts
Major Victory 100pts
Enable C CO on OBJ TAURUS = 75pts
E1 > 50% Combat Power = 15pts
Clear OBJ BULL in 30 min = 10pts
454 downloads
- m1a2
- singleplayer
- (and 1 more)
-

Tank Platoon: Movement to Contact
By Mirzayev
This is the first in a series of scenarios designed to familiarize new Steel Beasts players with basic Offense and Defense tasks executed by a Tank Platoon. This series uses US Army Doctrine as a basis, and aims to present the Tank Platoon's role when operating as part of an Armor Company. This series also focuses on introducing concepts within the game to the player, while maintaining a low level of difficulty to reduce frustration during the learning process.
Movement to contact is an offensive task designed to develop the situation and to establish or regain contact. It creates favorable conditions for subsequent tactical actions. The platoon leader conducts a movement to contact when the enemy situation is vague or not specific enough to conduct an attack. Forces executing this task seek to make contact using the smallest friendly force possible. A movement to contact may result in a meeting engagement, which is a combat action occurring when a moving force engages an enemy at an unexpected time and place. Once making contact with an enemy force, the leader has five options: attack, defend, bypass, delay, or withdraw. (ATP 3-20.15, Tank Platoon)
This scenario has been designed to allow the practice of the following eight (8x) concepts:
i. Conduct maneuver as a platoon.
ii. Conduct a movement to contact as part of a tank company.
iii. Conduct an attack by fire to destroy an inferior force.
iv. Employ mortars to destroy an inferior force.
v. React to enemy rotary wing assets as a platoon.
vi. Conduct a reload as a platoon.
vii. Break contact with a superior enemy force.
viii. Conduct a hasty attack as part of a tank company.
This scenario is rated by the author as very easy, and will likely take approximately thirty (30x) minutes to complete.
This scenario heavily favors friendly forces to facilitate a learning environment where tactical mistakes do not mean instant death. AVEPS have been included as a method for identifying tactical errors made by the player(s) by sorting through events during the AAR.
Special thanks to ben, Apocalypse, and Rooks and Kings for testing and providing feedback.
519 downloads
- beginner
- new player
- (and 5 more)
-

JUNO BEACH D-DAY
By Connaugh
JUNO BEACH - D-DAY
By Connaugh
SITUATION:
At the beginning of the Battle of Normandy, the 3rd Canadian Infantry Division, landed on Calvados coast. Saint-Aubin-sur-Mer, one of five Canadian landing sites, was located at the eastern end of Canada's assigned landing sector of Juno Beach. On D-Day, the 8th Canadian Infantry (Assault) Brigade (Group) stormed the beach, landing The North Shore (New Brunswick) Regiment, the 10th Armoured Regiment (The Fort Garry Horse). The Canadians were met by about 100 defenders who garrisoned the town's fortified 'Resistance Nest'. The Germans were largely unaffected by the preparatory barrage, as such they were able to put up heavy resistance at the beach and in the town, for most of the day, as the Canadians pushed inland.
MISSION:
Saint-Aubin-sur-Mer must be captured and held against any counter-attacks.
EXECUTION:
The 10th Armored Regiment tanks will disembark from their LST directly on the beach at Saint-Aubin-sur-Mer and breach the minefield and steel beam obstacles. The amphibious DD tanks of the 10th Armored and the 8th Canadian Infantry, disembarking from their landing craft, will make their way through the cleared lanes and capture Saint-Aubin-sur-Mer.
COMPOSITION OF FORCES:
10th Armored Regiment: 3 x M60A3 Tanks with Plows
2 x M60A3 Tanks with Rollers
10th Canadian Armored- DD Tanks 3 x PT76 Tanks
8th Canadian Infantry 4 x M113 Landing Craft with Infantry and LMG Teams.
Artillery 1 battery of 3 tubes
German Armor consists of Leopard AS1’s and AMX13-75’s.
And Infantry in ASLAV-PC’s.
VICTORY CONDITION:
Saint-Aubin-sur-Mer must be captured and all German AFV’s destroyed.
Scenario takes about 25 minutes to play.
Unzip JUNO BEACH D-DAY and save in your Scenarios Folder
Unzip CONNAUGH - JUNO BEACH and save in your Maps Folder.
155 downloads
(0 reviews)0 comments
Updated
-

War of the Oranges: Portugal - Spain
By Connaugh
WAR OF THE ORANGES: PORTUGAL - SPAIN
The town of Olivenza was under Portuguese sovereignty almost continuously between 1297 (Treaty of Alcañices) and 1801, when it was occupied by Spain during the War of the Oranges, so-named because Generalissimo Godoy sent oranges picked outside of Elvas to the Queen of Spain, and ceded that year under the Treaty of Badajoz. Spain has since administered the territory, whilst Portugal invokes the self-revocation of the Treaty of Badajoz, plus the Treaty of Vienna of 1815, to claim the return of the territory. In spite of the territorial dispute between Portugal and Spain, the issue has not been a sensitive matter in the relations between these two countries. Portugal has never made a formal claim to the territory after the Treaty of Vienna, but neither has it directly acknowledged Spanish sovereignty over Olivenza.
SITUATION:
The Irredentist Party has gained control of the government and has ordered its military forces to advance into Spain and occupy Olivenza with the intention that international pressure will force Spain to cede Olivenza back to Portugal.
MISSION:
Portuguese Armored Forces are to occupy Olivenza and defend it from any Spanish counter-attacks.
COMPOSITION OF FORCES:
PORTUGAL:
Grupo de Carros 2 x Leopard 2A6 Platoons
Batalhao de Infantaria 2 x M113A1 Platoons (with Javelin ATGM)
1 x Artillery Battery of 3 tubes
SPAIN:
Leopard 2E tanks
Centauros
Pizarros
VICTORY CONDITIONS:
Portugal wins if it destroys all Spanish AFV’s.
Spain wins if it occupies Olivenza.
Scenario takes about 40 minutes to play.
Unzip WAR OF THE ORANGES and save in your Scenarios Folder
Unzip CONNAUGH - OLIVENZA and save in your Maps Folder
162 downloads
(0 reviews)0 comments
Updated
-

PEGASUS BRIDGE
By Connaugh
PEGASUS BRIDGE
by Connaugh
SITUATION:
Allied forces have landed on the Normandy beaches.
Two bridges over the Caen Canal and the Orne River must be taken to prevent the rapid deployment of German reserves against the seaborne landings.
MISSION:
D Company, 6th British Airborne, carried in UH-60 Blackhawk Helicopters, is to capture the bridge over the Canal de Caen (Pegasus) next to Benouville and the bridge over the Orne River leading to Ranville and hold them against any armored counter-attacks until relieved by the 7th Armored.
EXECUTION:
1st, 2nd, and 3rd Squads are to capture and hold the Canal (Pegasus) Bridge.
4th and 5th Squads are to capture and hold the Ranville Bridge.
FORCE COMPOSITION:
D Company Squads consist of Infantry sections, LMG teams, and Dragon ATGM teams.
7th Armored consists of a M60A3 tank platoon.
Message will be generated when an objective is captured.
Scoring based on eliminating all enemy AFV’s.
NOTES:
Unzip PEGASUS BRIDGE and save in your scenarios folder.
Unzip CONNAUGH – PEGASUS BRIDGE and save in your maps folder.
133 downloads
(0 reviews)0 comments
Submitted
-

The Defense of Ceuta
By Connaugh
THE BATTLE OF CEUTA
By Connaugh
The government of Morocco has repeatedly called for Spain to transfer the sovereignty of Ceuta, drawing comparisons with Spain's territorial claim to Gibraltar.
The Spanish position is that Ceuta is an integral part of Spain, and has been since the 16th century, centuries prior to Morocco's independence from France in 1956,
whereas Gibraltar, being a British Overseas Territory, is not and never has been part of the United Kingdom. Morocco has claimed the territory is a colony.
One of the chief arguments used by Morocco to reclaim Ceuta comes from geography, as this exclave, which is surrounded by Morocco and the Mediterranean Sea,
has no territorial continuity with the rest of Spanish territory. This argument was originally developed by one of the founders of the Moroccan Istiqlal Party, Alal-El Faasi,
who openly advocated the Moroccan conquest of Ceuta and other territories under Spanish rule.
SITUATION:
The Istiqlal party has gained control of the government of Morocco and has ordered Armored Forces to invade Ceuta to return it to Moroccan sovereignty.
MISSION:
Spanish forces are to defend Ceuta from invasion by Moroccan Forces.
The Torre de Francisco de Asis, Torre de Piniers and Puente Del Quemadero are to be held until they are considered untenable and forces are to retreat to Ceuta. The city of Ceuta is to be defended.
FORCE COMPOSITION:
1st Platoon / 3rd Armored Cavalry Regiment - 2 x Leopard 2A4
2nd Platoon/ 3rd Armored Cavalry Regiment - 2 x Leopard 2A4
3rd Platoon / 3rd Armored Cavalry Regiment - 2 x Leopard 2A4
1st Platoon / 2nd Spanish Legion Tercio 2 x Centauros B1
54th Regulares Light Infantry with anti-tank weapons
Artillery of 2 batteries of 3 guns each.
Moroccan Forces include M60A3 tanks and M113A1 PC's.
Artillery is expected.
Mission Score dependent on controlling Ceuta at end of mission.
Unzip THE DEFENSE OF CEUTA and save in your Scenario Folder
Unzip CONNAUGH - CEUTA and save in your Maps Folder
249 downloads
-

Roadside Assistance
By Poofydoodle
Update: If you strongly dislike the manual transverse in the Scimitar please see my thread here for a third party program that can work around it.
Hello, this is my first released mission for Steel Beasts, I am someone who prefers light armor and wanted to make a fun mission around it. This mission was designed in single player but I see no reason why it wouldnt work in co-op.
This mission is set in the late 90s during a fictional African conflict, 2 Scimitars and an SF team must secure intel from and destroy a disabled enemy command vehicle before the enemy can recover it themself. The mission is designed to be challenging but with lots of random events for maximum replayability. The objective can spawn at one of 4 locations, the main enemy force is made up of 2 parts each have 4 different configurations and multiple routes into the objective and there are many patrols, ambushes, ieds etc that can spawn at certain places.
The scenario does not have a password so feel free to edit it if you wish to play it with a different vehicle or modify it but please just credit me if you use any part of it below I will paste the full mission briefing:
Jackrabbit team, 1st Recon Battalion
1) SITUATION:
ATTN: This mission uses random scripting to place the objective and setup the enemy forces. You will be given the objective location at mission start once the script runs so please start the mission when ready and setup your plan then if needed.
a) Enemy:
RED is an African nation mostly equipped with Soviet bloc era light armor and PCs, BMP1 and BTR60s are used in large numbers but they also have some scattered vehicles from other western sources. They also operate various technicals in both the government and insurgent forces. We have also had reports of what are suspected to be Russian backed mercenaries operating with them. These mercenaries are much better equipped and trained. They have been seen operating from their own BMP-2s, BTR-80s, and even Mi-8s.
b) Own:
BLU is an African nation equipped with mostly older European equipment. 2 Scimitar recon vehicles will take the lead, a special forces team is being carried by a Unimog truck armed with an MG3. A second Unimog is on standby if the first is to be disabled. The special forces team is armed with Panzerfaust 3s as well as a Dragon III.
c) Attachments and detachments:
Repair, supply, and medical vehicles are on standby at the checkpoint should they be needed.
d) Overview
We have recieved information that during an ambush and skirmish last night with allied militias an enemy command vehicle (MTLB) was disabled and abandoned until recovery could be made in the morning. This vehicle could be a source of very valuable intel and also may hold evidence we can use to prove the activity of Eastern European mercenaries active in REDs ranks.
The Ose river has formed a natural border for the conflict in this area. The 2 bridge crossing areas are flimsy and only very lightly armored vehicles are able to cross. The steep marshy banks make crossing with amphibious vehicles or laying a bridge very difficult. The checkpoint was established to help cut down on the number of insurgent vehicles crossing here to make their way to support the conflict in the North. Our Scimitars are among the heaviest vehicles that can safely cross the bridges. Even an M113 is too heavy to cross so if you need repairs you will have to try to tow the damaged vehicles back across the river.
Now that the sun is up RED will be launching an effort to secure the vehicle themselves so that one of their American M60 based recovery vehicles can safely enter in a second convoy to retrieve the vehicle. If they should beat you to the vehicle you are welcome to interdict and frustrate their attempt to recover the vehicle if it is safe to do so. The recovery vehicle is one of the only heavily armored vehicles in the region as most have been relocated to the main front.
The bulk of the enemy forces are organized far in the south and it will take some time to arrive, but expect to run into lookouts and patrols along the river. You should also be wary of possible patrols and enemy insurgent activity and ambushes in the disputed area south of the river however the odds of running into any hostiles north of the river is very low. Be ready for combat once you approach the river and anywhere south of the river. BRDMs, BTRs, and Technicals are a common sight near the river.
2) MISSION:
Your mission is to secure the area around the disabled enemy vehicle ASAP. Your Scimitars are very fast and have excellent cross country performance so use this to your advantage. Once the area is secure get the SF team within 50 meters of the objective and give them a few minutes to gather any intelligence and place an explosive charge at this point your orders are to pull out and escort the SF teams truck back to safe territory to the North of the Ose river.
When the mission starts you will be given a grid reference of the rough area of the objective, this is a limitation of the system to randomly place the objective so please pause the mission after entering if you desire to make a plan.
3) COMMAND AND SIGNALS:
Jackrabbit team: 2 Scimitar recon vehicles
Hare team: 1 Unimog truck armed with MG3, a 12 man Special Forces squad, and a second armed Unimog on standby.
102 downloads
(0 reviews)0 comments
Updated
-

River Crossing Defense (4.265)
By ben
Spanish Pizarro platoon and Leopardo section defend against a T72B1 company.
Your equipment: Pizarro F1, Leopardo 2E, Centauro B1, VAMTAC ST5.
Enemy equipment: T72B1m, T80U, BTR80, Vector ATTV.
Randomized enemy routes and locations.
Time frame: Around 60 mins.
236 downloads
(0 reviews)0 comments
Submitted
-

Operation Muppet v1
By Hedgehog
Early Cold War 50s/60 "Somewhere in Germany"
"A few days into WW3"
Small Coop / Large Single Player.
Recommended for Experienced Players.
Needs roughly 30-40% map time.
Difficult
Sections of this scenario will affect Average & Lower end systems where FPS will drop to 10-15.
(This is a non combat situation though)
ssssssssssssssssssssssssssssssssssssssssssssssssssssssssssssssssssssssssssssssssssssssssssssssssssssssssssssssssssssssssssssssss
Scenario Summary:
Take on the Warsaw Pact in 1950s “East Germany” in World War 3 Pre Nuclear scenario.
For Single player use:
Play as a Multiplayer session with yourself as host and pick player "Blue side."
Pick the T31 callsign.
Scenario Briefing:
OPORD Operation MUPPET
18-09-1955 17:00Z – 18:00 Local Time
1. SITUATION:
A. ENEMY FORCES:
1. S2 Intelligence estimates you will encounter a Reinforced Tank Company in prepared positions with Light Artillery and Light Air Support probable.
2. Enemy defensive capability is limited to damaged equipment collected from previous offensives in this area.
Reconnaissance has identified a reserve soviet tank unit in the enemy's rear which is road marching into the area and might be deployed in reaction to any friendly force advance.
There is a high likelihood of this happening.
Enemy is currently adopting an offensive posture and has been attacking since dawn this morning, as part of this offensive they have used chemical agents as marked by the GREEN area (vicinity 69 northing and 30 easting)
Enemy is not likely to withdraw or delay as they are currently on the offensive.
3. Enemy's Most Likely Course Of Action is an attack in full force from Objective MISS PIGGY westwards into friendly lines.
4. Enemy's Most Dangerous Course Of Action: As point 3.
B. FRIENDLY FORCES:
Friendly Forces in this operation will consist of Task Force 31, consisting of your Sho't Kal Tank Platoon, an M113AS4 Infantry Platoon. And 1st line CSS assets.
1. Higher's Mission & Intent:
Ajax Squadron has been pretty well wiped out, only 3 vehicles made it back and they're all busted up in some way, Badger Squadron is taking over the fight and your troop is being used to plug any gaps we might have.
2. Adjacent Units:
To the north is 5th RTR, to the south is 3rd RTR to our rear is 62nd Panzer Battalion ready to act as a Reserve.
C. SUPPORT UNITS:
1. Artillery: Access is granted to the following artillery assets:
4 x 2S9 Nona 120mm SPM Battery with HE & Smoke - 25lbr battery Proxy
4 x 2S9 Nona 120mm SPM Battery with HE & Smoke - 25lbr battery Proxy
4 x 2S9 Nona 120mm SPM Battery with HE & Smoke - 25lbr battery Proxy
4 x 2S9 Nona 120mm SPM Battery with HE & Smoke - 25lbr battery Proxy
2. Aviation: Air parity is questionable, you may get air support later, but as of now, No air support is available at this time.
D. Civil/Terrain considerations.
NATO and WARPAC forces are in a state of WAR, Unnecessary killing of Non Combatant Civilians and destruction of civilian property is to be avoided if possible.
Civilian convoys of refugee are present in the area, these are NOT to be fired upon unless posing a direct threat to friendly forces.
2. MISSION:
Task Force 31 is to conduct a hasty attack on the enemy units defending Objectives MISS PIGGY, KERMIT & GONZO the Terrain Objective is for orientation purposes only.
Primary objective is the destruction of enemy defending units with minimum casualties.
Destruction of enemy command posts, artillery, logistics, or air defence units should be considered a secondary objective.
3. EXECUTION:
Task Force 31 will operate in the zone defined by the following Phase lines. Left and right boundaries are shown as Phase Lines BUNSEN and BEAKER.
Jump off point is defined as Phase Line FOZZIE BEAR, and the limit of advance is shown as Phase Line ROWLF.
A. Commander's intent: Repulse enemy attack on own line by Badger Squadron with assistance from elements of Cyclops Squadron (Task Force 31)
1. Center of gravity: is likely to be Engagement Area (EA) BIG BIRD, Priority of fires are to be in this area.
2. Critical vulnerability: The area south of hill 329 is lightly held.
3. Exploitation plan: Bypass Hill 329 to th south and hit the Soviet Southern Flank as they attack into EA Big Bird.
4. Desired Endstate: Soviet Attack Repulsed with minimal casualties. Objectives MISS PIGGY KERMIT & GONZO cleared of all enemy forces.
B. Concept of the Operations:
1. Scheme of Manoeuvre: Up to you, as you are the Task force Leader.
2. Fire Support Plan: You have priority of fires. Liaise with G10A with any fire mission requests.
C. Tasks: Attack the enemy defending Objectives MISS PIGGY, KERMIT & GONZO
D. Coordinating Instructions: 2nd Squadron will hold Devils Dyke laying fires into EA BIG BIRD, Friendly Infantry are dug in on the main ridge line running north south at this position.
4. SUPPLY AND SUSTAINMENT
A. Enemy POW's are to be left in place or directed to a holding area*
Casevac to be handled by own CSS assets.
*Stay where they are or move as a group under script control.
B. Regiment command has set up a replenishment point in the vicinity of “Bismark”.
Task Force 31 will secure Class I, III,and V supplies at this location.
(Your Tanks have a full Main Gun ammo load, and about 80% MG ammo, You have Low Fuel Levels)
5. SIGNALS:
A. Signal
1. Primary -28.250
2. Alternate -28.350
3. Contingency -28.450
4. Emergency -28.750
B. Command
1. Location of Key Leaders: Command Post Able (Sunray Sunray Minor & Shelldrake)
2. Succession of Command: T31 > T31A > I11A > T31B > T31C (If present)
End of Briefing.
Scenario specific changes / mods:
Engines and Tracks repair after 15mins "Field Bodges" / "Short Tracking"
If the Tracks are short tracked in this manner suspension is damaged to reflect being short tracked.
Each Combat vehicle (T31 & I11 platoon) has vehicle has 2 "Extra lives" (identified by "-" suffix)
I.E.
T31 has T31-a & T31-b
T31A has T31A-a & T31A-b
etc
So if you lose: T31, T31-a & T31-b, you won't get another T31 callsign and will be reduced by one vehicle.
223 downloads
(0 reviews)0 comments
Updated
-

Arid Valleys Recon (4.265)
By ben
1988 US Tank Platoon reconnaissance operation.
Your equipment: M1A1, M113A3, Infantry.
Enemy equipment: T72B1, BMP2, Infantry.
Randomized enemy forces and locations.
Time frame: Upto 90 Minutes.
Requires Map: "sce_Arid Valleys Recon_100" (UID bfc9c768-305d-48af-bb36-675c70e4cc14)
The map is now available on the in game map package downloader.
If that fails for some reason use this link:
https://www.dropbox.com/s/lz1yr1spat7r2lg/sce_Arid Valleys Recon_100.zip?dl=0
317 downloads
(1 review)0 comments
Updated
-

Clearing Kandahar (CANFOR)
Single player or Small-Side Cooperative
Clearing Kandahar (CANFOR Version)
by Apocalypse
I. Situation. Enemy fighters have taken control of Kandahar province. Afghan Security Forces have either retrograded from the area or have fled from their positions. Enemy fighters have total freedom of movement, and intelligence reports now indicate a potential enemy offensive being planned against the Kandahar Airfield.
Composition: The enemy fighters in this area have gained significant momentum and are heavily-armed with automatic weapons, obstacles (command-wire IEDs, mines, and wire), RPGs, and Recoilless Rifles . The enemy also has acccess to 81mm mortars which have been used against the airfield in recent indirect-fire attacks. The exact mortar-firing location location remains unknown, but counter-fire data suggests potential mortar firing positions in the Thickets or Pomegranite fields.
Tactics: We expect the enemy to be well coordinated. They will fight in small teams (2-4 men) using indirect fire to fix, and indirect fire to destroy friendly forces.
Command and Logistics: Intelligence indicates that there is a high likelyhood of an enemy Command Post that is located in Dand. This command post is responsible for controlling the activity for all enemy fighters in the area, as well as the planning activity for an planned attack on the Kandahar airfield. We also suspect a supply cache located in Dand that is pre-staged to support the attack on the airfield.
Local Population: Local sentiment remains neutral. However, that can shift dramatically if any side were to show hostility toward the local populace.
II. Mission. Attack to clear enemy forces from Objective Rangers to set conditions for follow-on attack on Kandahar City.
III. Execution A Canadian Mechanized Rifle Battalion has been ordered to the area to conduct a deliberate clearance of Kandahar City within the next 24 hours. Your Platoon will serve as a shaping operation and clear the area directly north of the airfield, to include OBJECTIVE RANGERS - this deters any enemy attack on the airfield and provide time and space to allow follow our forces to conduct a large-scale clearing operation.
Key Tasks
1. Clear Objective Rangers
2. Locate / Destroy the enemy Command Post
3. Locate / Destroy the enemy mortars
End State (Win Conditions)
W1: OBJ Rangers Cleared
W2: Enemy Command Post Destroyed
W3: Enemy Mortars destroyed
Fires: A 120mm mounted mortar section is available for your use
IV. Service & Support: Your platoon is full on supplies; a logistics rally point has been established on the FOB and will move forward as the mission progresses
V. Signals
Map Contacts: Own Party
Friendly ID: On
272 downloads
- singleplayer
- cooperative
- (and 2 more)
(0 reviews)0 comments
Submitted