

Apocalypse 31
-
Posts
2,770 -
Joined
-
Last visited
-
Days Won
66
Content Type
Forums
Events
Downloads
Articles
Files posted by Apocalypse 31
-
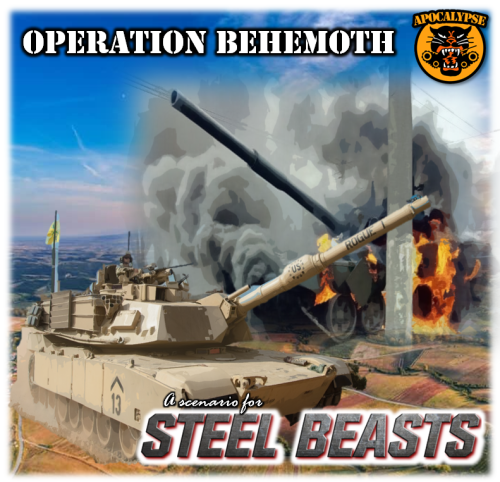
Operation Behemoth
By Apocalypse 31 in Platoon
Operation Behemoth
by Apocalypse
I. Situation. Enemy forces are defending the high ground in vicinity of OB TAURUS and BULL. We expect a light infantry Company defending the hills near OBJ TAURUS with a company of T-90s defending the intersection in vicinity of OBJ BULL, and enemy scouts defending the flanks. Friendly forces are arrayed south of PL BRONZE, with your platoon positioned along the eastern flank.
II. Mission. Attack to destroy enemy armor in vicinity OBJ BULL to enable C CO attack on OBJ TAURUS.
III. Execution.
a. Concept. Elements of E and D Companies will attack to destroy enemy forces on OBJ BULL. E1 (you) and D1 will attack while D2 establishes an attack by fire position on the high ground to your east. Once OBJ BULL is cleared of enemy armor, call C CO to begin their attack to seize OBJ TAURUS.
b. Fires.
1. 4x 120mm Mortars are available to support your movement.
2. Air sorties will conduct attacks on OBJ TAURUS (You do not control)
IV. Service & Support. No change. All elements are 100% on fuel and ammunition
V. Signals
Friendly ID: On
Observer View: On
Map Contacts: Enabled
Triggers
1) D CO Support Elements move into position
2) C CO begins their assault on OBJ TAURUS
Scoring
Victory 75pts
Major Victory 100pts
Enable C CO on OBJ TAURUS = 75pts
E1 > 50% Combat Power = 15pts
Clear OBJ BULL in 30 min = 10pts
454 downloads
- m1a2
- singleplayer
- (and 1 more)
-

Defense At Vollsjo
By Apocalypse 31 in Company
Defense at Vollsjo
by Apocalypse
Based on the 2024 LHI Scania Campaign - developed by Los
The silence of the commanders tank was suddenly interrupted by the cackling of the radio.
The entire crew could hear the unmistakable voice: the Battalion commander of the 228th Mech Battalion was speaking loudly and rapidly firing instructions to his subordinate commander like a machine gun.
"Yes sir, immediate Torrike attack against Vollsjo", "yes sir. immediate evacuation of government personnel from Vollsjo" repeated the company commander, vocalizing it loud enough so that he could confirm his tasks and prepare to pass them to his subordinates. After a short exchange and confirmation of his new mission, the captain jumped from his turret to the side of his tank where his First Sergeant and XO were waiting.
The captain, who hadn't slept in 72 hours was pushing himself beyond his physical limits. His home was near the Torrike border and rumors were circulating that his wife and two children were missing and presumed dead. Some of the men in the company were from the area and were quite literally fighting in their own back yards
"Sir, does he know that we only have a handful of tanks and a few civilians defending?" quipped the First Sergeant. "Of course he does" the Captain quickly responded then turned to the XO, "bring the platoon leaders to my vehicle immediately".
Moments later the XO returned with two lieutenants and a staff sergeant.
"Gentlemen, we've received word from the Battalion Commander and here's the situation:
2nd Company will attack in our north, towards Frannigen. They are stepping off in approximately 30 minutes and we've been ordered to HOLD Vollsjo.
A Torrike Mechanized Infantry Battalion is mounting a counter-attack against Vollsjo to seize the bridges. We suspect that they will attack along two axis - to the north and from the east. They will attack with three companies spread between each axis, each supported with a platoon of tanks. We expect that their Battalion scout platoon is already observing us and will initiate movement shortly. We expect the enemy to employ their organic mortars and also artillery to suppress our forces.
It is also possible that the Torrike's will reinforce their MIBN with a second tank company that will attack with their recon element. And if that wasn't enough - we're also hearing that the enemy will be supported by helicopter gunships.
We expect civilians to flee there village but there are also 20 civilian government employees in Vollsjo that we MUST evacuate. They have made a valiant effort in keeping the essential services of Vollsjo functioning so that the Home Guard could survive, but the governor has issued the order for their immediate evacuation and we will need to evacuate them to prevent their deaths or capture - the Battalion commander has sent a mounted element to assist us with that task, but they are coming from the north, through disputed area.
We are expecting enemy scouts to make contact with us in approximately 8 minutes, and with their main body in 20 minutes. We must hold the bridges. Are there any questions?"
87 downloads
(0 reviews)0 comments
Submitted
-

OPERATION WHETSTONE
By Apocalypse 31 in Batallion
Operation Whetstone
by Apocalypse
This mission concept was originally developed by the UK FIGHT CLUB and played in Combat Mission Professional. This is a port to Steel Beasts, where the entire mission could be played in a single battle - utilizing the strengths of Steel Beasts to fight an entire mixed UK Battlegroup concept to see how results could be achieved when an entire Battlegroup could be utilized simultaneously instead of cut into smaller Combat Mission sized scenarios.
This is a large mission and I would recommend at least 4 players (we played with eight)
Forces Available
ISTAR Scout Platoon
-12x Jackal (50cal) & 2-man Dismount teams (1x AT4) and Quadcopters
-3x MB300 (Javelin Teams)
-2x 81mm Mortars
Light Infantry Coy
-6x Bushmaster (8-man Squad, 1x NLAW ea)
-3x MB300 (Javelin Teams)
-2x 81mm Mortars
Combined Arms Company
-2x4 Boxer Platoons (6-man Squad, 1x NLAW ea)
-3x CR2 Tanks
-2x 81mm Mortars
-6x 15mm AS90 (Offscreen)
SITUATION
A Donovian Mechanized Infantry Battalion is moving towards the area with the intent of clearing Copehill Down and seizing Objective 2 - the critical intersection near RTE 303 and 360. The MIBN is organized into three companies of BMP-2 and supported with a platoon of T-72B3 tanks. They also have a reconnaissance Company of 3x platoons of Tiger trucks and MTLB forward observers. We have also identified a flight of MI-24's that will potentially support the attack into the AO. We can expect the Donovians to use two companies as a fixing force while enabling the third company to seize objective 2.
Mission: Defeat DONOVIAN MIBN attacking into the AO
Tasks:
1. Retain Copehill Down
2. Retain OBJ 2 (RTE 303/360)
Want to join the joint the fun? Checkout the TankSim Discord: https://discord.gg/kpnZUUFce7
59 downloads
(0 reviews)0 comments
Updated
-
Recon At Vollsjo
By Apocalypse 31 in Platoon
This is part of an ongoing Steel Beasts campaign with Loscon Heavy Industries
Recon at Vollsjo
by Apocalypse
Situation
Torrike forces have continued their attack into the area and it must be stopped!
Torrike forces have moved an advanced guard force into the area which consists of a mechanized infantry company (3x Platoons of BMP-2) an understrength Tank Company (6x T72B3), and a recon platoon (3x BMP2/Infantry). We expect their tank company to be set somewhere west of Vollsjo with supporting mechanized infantry platoons defending the area, and reconnaissance vehicles forward of the river. We expect mounted observation posts with 3-man recon patrols west of the river.
Your scout platoon is on point for the 28th Brigade- we have a friendly tank company nearby ready to strike against the Torrike advanced guard but you must provide a recommendation for which axis our tankers can advance across. You have 90 minutes to conduct a reconnaissance of the area - determine the BEST approach for our tanks so that they can destroy the enemy tank company and force a withdrawal of the advanced guard - this may halt the entire Torrike offensive in the area! We have 90 minutes to force the Torrike Advanced Guard from the area before they reinforce with the intent to continue their attack.
Our artillery batteries are falling back and you have no support for this mission.
You have 4x 2-man recon teams within the platoon that are equipped with 1x Spike SR, 1x Quadcopter, and JIM thermal imagers.
Your vehicles are equipped with medium-range radios - if the vehicles are destroyed then you will be unable to communicate your recommendation to our friendly tanks.
Use Triggers 1, 2, and 3 to recommend a route to the tanks.
Mission Failure If:
a. Loss of Scout Vehicles before you make the radio call to D-1 (no radios = no call)
b. No decision in 90 minutes
c. D-1 becomes inop and cannot destroy the enemy tanks (pick the best route!)
The enemy forces array in this scenario is randomized for re-playability
70 downloads
- luchs
- reconnaissance
- (and 1 more)
(0 reviews)0 comments
Submitted
-

Enhanced Instant Action
By Apocalypse 31 in 4.1+ SINGLE PLAYER SCENARIOS
This scenario allows players to select a vehicle type and and an enemy type as they perform instant action.
Use the Trigger menu to begin.
Feel free to edit this scenario as you want - but also please make any suggestions as you see them.
199 downloads
(5 reviews)0 comments
Updated
-
Ejército Nacional de Colombia
By Apocalypse 31 in Infantry & Crewman
This mod replaces the Brazilian camouflage pattern with that of the Colombian Army.
To Install:
Extract the zip into your in-game MODS folder
File path
Mods-Textures-Camo-Woodland-BR
9 downloads
(0 reviews)0 comments
Updated
-

UK MTP Camouflage
By Apocalypse 31 in Infantry & Crewman
This mod upgrades UK Infantry from their older DPM camouflage to the more modern Multi-Terrain Pattern (MTP).
To install:
Extract the zip into the Mods/Textures folder.
26 downloads
(0 reviews)0 comments
Submitted
-

Opening The Gate
By Apocalypse 31 in Company
Combat Power
2x PLT LEO 2A4
1x PLT Marder 1A3
I. SITUATION
a. Enemy. Enemy forces from a Mechanized Infantry Battalion (BMP-2) have established a defensive perimeter around the city of Stadthagen. In our sector, we have a mechanized infantry company supported by T-72 tanks in a defensive position which has a kill zone overlooking a critical portion of Highway 65. We also expect to see a scout platoon in a screen along the enemy's western flank.
b. Friendly. Our parent Battalion will conduct an attack on Stadthagen, and your Company is first in the order of attack. It is critical to destroy the enemy armor north of Highway 65, or it will stall this entire attack. You have 90 minutes to complete this attack or the entire brigade will be thrown off of its timeline.
II. MISSION. Attack to clear the enemy position between Phase Line Betty and Phase Line Carol no later than H+90 minutes to allow friendly forces passage along Highway 65.
III. EXECUTION
Key Tasks
1. Clear the enemy position north of Highway 65
2. Preserve your combat power - you will most likely be part of the attack on Stathagen
3. Prevent unnecessary destruction of civilian property
Fires. 1x Mortar Platoon in support (4x tubes)
IV SUPPORT
Organic Resupply and Medical Support - all repairs will be conducted post-operation, during reconsolidation.
V SIGNALS
Friendly ID: On
Map Contacts: Enabled
Overhead View: On
226 downloads
- leo2a4
- marder 1a3
- (and 3 more)
-

Limnos Island Map ("ALTIS")
By Apocalypse 31 in 4.1+ Map Packages
Limnos Island Map
Commonly known as ALTIS in the game ARMA III.
This project is maybe 50% complete, but I've been working on it since 2018 and I wanted to finally just get it published.
This is with great help from @MatsW, who kindly provided me the height map of the blank island of Limnos many years ago.
1. Every object you see in game is hand placed with the exception of the road network, which I also had to replace. Every bush, tree, house, and stream has been hand placed with consideration for the scale and terrain of the real life island but also adapted to the fictional island of Altis, which is just under 1/2 scale of the real island. This map has taken so long that I've actually had to revert back much work to update certain areas to Steel Beasts standards - for example - in 4.1 we were given terrain alteration tools which helped drastically, but that also meant going back and re-do much of the work that was already done. Recently, Custom Line objects were also added - this caused me to go back and deleted hundreds, maybe thousands, of standard Line Objects that I used across the map. This has taken a lot of effort.
2. Some of the villages are modelled accurately to ARMA III, but in many cases it wasn't possible due to many factors. The terrain in ARMA is smaller than 1/2 scale, so there was much more room in the 1:1 Steel Beasts version that I've made. The designers of the Altis island also made some drastic adjustments to the real life terrain, flattening many areas that aren't flat on the real life island of Limnos.
3. This map is an ongoing project and I assess it to be about 50% complete. The main area where the ARMA III campaign takes place is 'good enough' at this point, but everything on the west and northwest side of the island has been untouched. Areas that are incomplete show small streams as house outlines.
To Install:
Download the zip file and drop the contents in your Map Packages directory
C:\ProgramData\eSim Games\Steel Beasts\maps
160 downloads
(2 reviews)0 comments
Updated
-

Counterattack At Al Miram
By Apocalypse 31 in Platoon
Counterattack At Al Miram
by Apocalypse
I. Situation.
We have detected an enemy attack to seize crossings at the Jahj Canal in an attempt to break out of Al Miram. Your scout platoon is currently positioned near Hill 138, with dismounted positions established at OPs ALPHA & BRAVO. We observed an enemy armor platoon preparing for the attack but lost contact after our drone was shot down by a Surface to Air missile somewhere near Al Miram. We are dispatching friendly armor reinforcements but they will take approximately 15 minutes to arrive. In the meantime, we have dispatched a flight of AH64's that will arrive in 10 minutes.
Insurgent forces also control the village of Al Miram. The presence of Surface to Air missiles has made aerial reconnaissance difficult, and their exact composition is unknown. However, based on Human Intelligence reports we can estimate at least one platoon of T-55 tanks reinforced with infantry is defending the village.
II. Mission. Defend against enemy attacks along the Jahj Canal and then counterattack to clear Al Miram.
III. Execution. A flight of (2) AH64's is en route and will arrive within 10 minutes. Friendly armor is also en route and will arrive in 15 minutes. Hold positions along the Jahj Canal at OP ALPHA & BRAVO and then counter-attack to clear the village of Al Miram.
a. Fires. You have two 120mm Mortars and a platoon of 155mm directly supporting you.
b. Aviation. 2x AH64's will arrive in 10 minutes. A UAV was shot down recently and there IS a SAM threat in the village.
c. Engineers. No engineer support is available, however, a small minefield has been established near OP BRAVO.
IV. Service & Support. Logistics support is currently out of range. All forces are fully equipped and supplied. Resupply will be conducted following this operation
V. Command & Signal
a. Friendly ID: On
b. Overhead View: On
c. Map Updates: Enabled
238 downloads
(0 reviews)0 comments
Submitted
-

Operation Talon Strike
By Apocalypse 31 in Platoon
Mission 1:
Operation Talon Strike
This is what I see as the first user-created operation, since the Operation system was introduced several years ago.
Background
This operation will take the player through several Platoon-sized missions using a variety of vehicles and equipment, and set in a fictional European conflict.
Each mission is limited to four playable vehicles, with adjacent BLUEFOR units scripted to move with the player-controlled units.
Performance Matters: Major Victories will result in benefits for the player and may unlock future missions. Defeats will still progress the operation, but may put the player in a tougher spot for future missions. Defeat = advantage REDFOR.
Installation
Drop the Talon Strike folder and .opc file in the following directory: Documents\eSim Games\Steel Beasts\My Operations
This went through three Beta's before being published. Let me know if you find any bugs and I will do my best to fix immediately.
Special Thanks: Mirzayev for beta testing and providing valuable feedback
Thanks for Playing!
==========OPERATIONAL SITUATION==========
Radonia - a nation facing a violent, internal conflict.
a. General Situation
Radonia sits on the Eastern-most edge of the region. Previously part of the larger Dradvic Republic, it has been an independent nation since the end of the Second World War. Years before separation, the Dradvic Republic used Radonia as a buffer between itself and bordering NATO-aligned countries. However, since its post-war separation, Radonia has faced internal challenges with hot-blooded rival political parties and a radically fluctuating and unstable economy. All the while, the Dradvic Republic has maintain significant influence along its northern border, and many northern Radonian families still maintain ties in the Dradvic Republic.
In more recent history, political rivalries reached a flash point; two years previous, the youth of Radonia called for national reform in economic and trade policies, but many conservative groups quickly rejected the change and sparks ignited across the country. Those sparks quickly turned to flames, and in that time Radonia saw a rapid rise of violence and armed rebellion groups. As conditions deteriorated across Radonia, political leaders in the northern regional capital of Malinska denounced their union with Radonia and declared separation into an independent state.
The regional capital, Malinska, sits near the northern border between Radonia and The Dradvic Republic. People of the region have historically favored the Dradvic Republic, in culture, lineage, and political views. In the recent chaos of Radonia, the most notable armed rebellion group has been the Radonian People’s Militia, who seemed to have organized, armed, and deployed forces faster than any other armed rebel group.
b. Enemy
The Radonian Peoples Militia (RPM) is manned, equipped, and trained as well as any Radonian military unit. Radonia previously enforced a conscription program which has allowed for most adults to gain a basic understanding of tactics and discipline, but the RPM is also supplemented with combat advisors and cadre from the Dradvic Republic. Deterioration in Radonian security forces also allowed the RPM to raid military depots and arsenals in the north to equip their own forces.
The Radonian Peoples Militia - Malinska Brigade (RPM-MB) is center of gravity for the RPM. It’s leader is a recorded member of the Dradvic Republic Special Purpose Forces, and is capable of receiving funding, equipment, and additional manpower directly from the Dradvic Republic.
The RPM-MD is organized into 5x Battalions:
3x Mechanized Infantry Battalions [MIBN] (2x BMP-1 / 1x MTLB)
1x Tank Battalion (T-55)
1x Field Artillery Battalion (2S1 / SA-19)
1x HQ & Support Company
A majority of the Brigade's combat power is positioned in the city Malinska, where they can maintain the most influence. Battalions are also positioned along Highway 10; 1 MIBN defends the eastern flank near Latria and Kovuto Island, and 2 MIBN defends the west flank near Tashoor.
Their Field Artillery battalion has batteries split, in support of MIBNs along Highway 10, but we suspect that they have positioned their SA19 systems to the east of Malinska, as it is a more suitable air avenue of approach for our aircraft.
The Malinska Brigade command post is currently established inside of Malinska and is a hotbed of activity for military coordination as well as political support from foreign visitors. From this command post, the Malinska Brigade leadership can coordinate operational activities across their front, as well as logistics efforts to the north, along Highway 1.
c. Friendly
The Radonian ground forces are well-equipped, trained and led. However, their entire Ground Forces Command only consists of two Home Defense Brigades and one Infantry Brigade.
The Radonian Home Defense Brigade in Malinska disintegrated last year, with most of its members joining the ranks of the Malinska Brigade. The remaining members still maintain their positions south of Malinska, but in limited numbers, and are most likely not capable of preventing the Malinska Brigade from attacking south of the city.
The 1st Radonian "FALCON" Brigade (YOU) has deployed to the area and is prepared to conduct combat operations against the Radonian Peoples Militia.
The Falcon Brigade consists of
Task Force HAMMER (Leopard 2A4)
Task Force ANVIL (Pizzaro)
Task Force SNAKE (LAV-25)
Task Force HAWK (Special Operations Recon)
Task Force THUNDER (2S3)
The mission of FALCON Brigade is to defeat the Radonian Peoples Militia (Malinska Brigade) operating in/around Malinska to restore the security posture in the region and improve Radonia's national security posture against international threats.
Our Brigade will do this by swiftly attacking into the flanks of the Malinska Brigade to secure key terrain and influence support-zone activities, and to isolate the defenders of Malinska. Once conditions are set, we will launch an aggressive armor attack into the city-center to destroy remaining RPM-MB threats and restore the security posture of the area.
1,163 downloads
-

Desert Strike
By Apocalypse 31 in Company
I. Situation
Yesterday, our human intelligence indicated that there was an attack being planned on El Jibah - these claims were confirmed 12 hours ago as JSTARs confirmed the build up of heavy armor to the north, in vicinity of Al Doreen. The enemy has rallied a mixed company of T62 tanks and BMP1's for their attack on El Jibah. We have also detected a command node operating in Al Doreen that is coordinating the attack as well as a supply node somewhere near the Doreen Ridge that is caching critical supplies to sustain insurgents in the area.
We currently have an infantry section from B CO defending the north bridge into El Jibah, an have a platoon of M2s staged to the south at COP Cardinals. Additionally, the JTF commander has allocated to us a firing battery of 155mm guns, a section of MLR rockets, and a flight of AH64's to assist in our mission.
II. Mission
Defeat enemy operating in the AO
III. Execution
Tasks
1. Defend El Jibah from insurgent attacks from the north
2. Clear Al Doreen / Destroy the enemy HQ
3. Clear the Doreen Ridge / Destroy the supply node
Fires
6x 155mm Guns
2x Rocket Strikes
IV. Sustainment
All forces have been fully resupplied - additional supplies and medical assets are located on FOB Cardinals
V. Signals
-Friendly ID: On
-Map Contacts: Enabled
-Overhead View: On
Scenario Ending
-Enemy Armor Destroyed
-HQ in Al Doreen is destroyed
-Doreen Ridge is cleared
398 downloads
-
![More information about "Stryker Ambush [REDUX!]"](https://www.steelbeasts.com/uploads/monthly_2022_08/sap.thumb.png.14464d27efd1337825888c024c652748.png)
Stryker Ambush [REDUX!]
By Apocalypse 31 in Company
Stryker Ambush
by LTHenkle
Edited by Apocalypse
A CO, 2nd Battalion, 3rd Infantry Regiment
3rd Brigade, 2nd Infantry Division (ARROWHEAD)
1) Situation:
a) Enemy:
Units of the Iraqi MEDINA division in company strength are conducting an attack north towards APOD SULTAN MURAT. The enemy's most probably course of action is to rapidly push north with an advanced guard and seize the airport to prevent further US force-flow into the area. UAV reconnaissance reports 2x T55 tank platoons, and several BMP1, MTLB und BTR 70 platoons in company strength. 2 mechinf plts are most likely conducting reconnaissance in front of the main body.
b) own forces:
A CO, 2nd Battalion, 3rd Infantry Regiment has begun deployment as the early entry force of 3rd Brigade, 2 Infantry Division (Arrowhead) at APOD SULTAN MURAT. A section of 2x Stryker MGS are already in position south of the airfield to secure the area. B coy has just started arriving
2) Mission: A/2-3 Infantry destroys enemy advance elements still south of gridline 01 and provides security for the deployment of forces at APOD SULTAN MURAT
3) Execution
Tasks:
1. Destroy the Medina Division's Advanced Guard
Fires
2x 120mm Mortars
4x 155mm Guns
15x Air Strikes
4) Sustainment
Resupply assets have not deployed forward yet.
The company medical vehicle is located near the airport
5) Signals
Friendly ID: On
Map Contacts: Enabled
Overhead View: On
189 downloads
(0 reviews)0 comments
Updated
-

Movement To Contact
By Apocalypse 31 in Company
Movement to Contact
By Apocalypse
I. Situation: A reinforced enemy mechanized infantry company has established a defense-in-depth along the river. They are composed of 3x PLT of BMP2's and infantry, with tank support consisting of 2x Platoons of T-72B3 tanks.
II. MISSION: Attack to seize OBJ BEAR so that friendly forces can continue offensive operations to the north
III. EXECUTION:
Tasks
1. Seize OBJ Bear
Fires
2x 120mm Mortars
4x 155mm Guns
Aviation: None
IV. Sustainment
-1x Medical Track
1x Resupply Truck
V Signals
a. Friendly ID: On
b. Map Contacts: Friendly Only
c. Overhead View: On
305 downloads
(1 review)0 comments
Updated
-

Operation Bronze Hammer
By Apocalypse 31 in Batallion
Operation Bronze Hammer
By Apocalypse
Combat Power:
A Co: 3x Tank Plt
B Co: 3x Tank Plt
C Co: 3x Tank Plt / 1x Light Inf PLT (Defending)
D Co: 3x Mech Inf Plt
E Co: 2x EN Vehicles (Land w/ C CO)
F Co: 2x Stryker MGS Plt, 1x LAV PLT
I. SITUATION
Enemy forces defending the area with a mechanized infantry brigade (BMP-3) supported by T-90 tanks. We expect a disruption force positioned between PL AXE and BOW with mostly light and mechanized forces with their main battle zone between PL BOW and CHAIN, followed by a support zone around the town of Kupo and Port Surao. We expect to see company battle positions defending along key terrain, supported by tank platoons in hide sites further to the rear. Enemy forces are oriented on the Main Battle Zone, but will fall back to Port Surao and Kupo to defend. We dont expect a constested landing on the west shore, however, the north shore is defended and the enemy has conducted probing attacks against C Co's position all night.
II. MISSION. Attack to clear enemy forces from the Kupo Penninsula.
III. EXECUTION
a. Tasks
1. Clear Kupo
2. Clear Port Surao
b. Fires
Guns: 18x (720 HE / 560 SMK)
Tubes: 6x Wheeled Mortars (will land with HQ)
Air: 15x Airstrikes
Helicopters: None - weather does not support
c. Force Flow
HQ: Landing at H+30min at east shore (scout platoon landed)
A Co: Landed on west shore
B Co: Landing at H+30 min at south shore
C Co: Landing at H+40 min at south shore
D Co: Landed on west shore // CO + D3 landing at H+30
E Co: Landing with C CO Assets
F Co: Prepared to land on north shore (TRIGGER 1)
IV. SERVICE & SUPPORT
a. Resupply: 3x Trucks (will land with HQ)
b. Repair: Post-Operation (no assets)
c. Medical: 2x Ambulance (will land with HQ)
d. Transportation: I CO is your amphibious force - will automatically land forces ashore (non-playable)
V. SIGNALS
-Map Contacts: Enabled
-Friendy ID: On
-Overhead View: On
-Triggers
1. Lands F CO
Scoring
Major Victory: 100pts
Victory: 80pts
Kupo Cleared: 40pts
Port Surao Cleared: 40pts
Less than 50% AFV losses: 20pts
Ending
-Kupo is cleared of enemy and friendly forces not under direct fire in Kupo for 2 min
-Port Surao is cleared of enemy and friendly forces not under direct fire in Port Surao for 2 min
-Friendly forces anywhere not under direct fire for 2 min
264 downloads
(1 review)0 comments
Updated
-
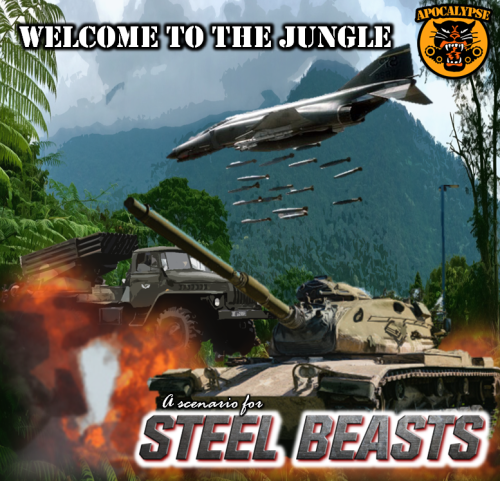
Welcome to the Jungle
By Apocalypse 31 in Company
Welcome to The Jungle
by Apocalypse
I. SITUATION
The area north of the Cam Dinh jungle is a hotbed of enemy activity, and recent intelligence reports indicate the arrival of BM-21 rocket systems into the area to support future enemy offensive strikes south of the Khulean River. Additional reports indicate the presence of a major enemy supply node that is massing supplies in a valley to the west of the Buon Ma Long mountains.
We have defined two Targeted Areas of Interest where we can expect to see enemy Rocket Systems (TAI 01 & 02), and an additional TAI for the enemy supply node (TAI 03).
The Division commander is organizing an attack to completely clear the enemy north of the Cam Dinh, and this operation is the first phase. It is imperative that we weaken the enemy by reducing their long range rocket capability as well as diminish their supplies prior to attacking into the area. Additionally, the Division G2 has identified the area near OBJ TIGER to serve as a future forward operating base for future attacks into the enemy-ridden landscape of the Bao Son and Buon Ma Long mountains.
During this phase, we expect to see conventional enemy forces consisting of a mechanized infantry battlion (BMP-1) operating in company battle positions along key terrain. Enemy forces will employ spotter/obervers forward of their battle positions, supported by 152mm guns in the northern hills of the Bao Son, as well as Anti-Aircraft guns positioned along air axes to protect their high value targets.
Our ground forces are staged south of the Phunya River, and our air assets are staged even further south. We also have a platoon of 155mm guns on standby, ready to be airlifted into Firebase Delta
II. MISSION. Attack to defeat enemy forces operating north of the Cam DInh jungle.
III. EXECUTION
a. Tasks
1. Identify and Destroy Rocket Artillery in TAI 01 or 02
2. Identify and Destroy Supply Point in TAI 03
3. Seize OBJ TIGER
4. Preserve Scout Helicopters
5. Preserve AFVs
b. Fires
2x 120mm Mortars
6x 155mm Guns (Will Air Assault into Firebase Delta)
c. Aviation
2x Recon Helicopters (FAC)
4x Utility Helicopters (+Infantry Squads)
1x Supply Helicopter
15x Air Strikes
IV. SUSTAINMENT
1x Medic Truck
1x Supply Truck
1x Supply Aircraft
V. SIGNALS
Friendly ID: On
Map Contacts: Enabled
Overhead View: On
Triggers
1. Launch Air Assault of Artillery into Firebase Delta
Scoring: 100 points
Major Victory 100 points
Victory 80pts
All OBJ 80pts
AFV > 35% 10 pts
Scout Aircraft 10 pts
175 downloads
(1 review)0 comments
Submitted
-

Day of Decision
By Apocalypse 31 in Company
Day of Decision
by Apocalypse
01 APR 25
0700 HRS
I. SITUATION
Once again, tensions are quickly rising along the Atropian/Donovian border. A recent border disput (yet again) has caused the Donovian National Command Authority to direct the Southern Army to re-position combat power along the Donovian/Atropian border. Combat forces from the 80th Mechanized Division are staged near the town of Badakhashon with the mission of smashing through the border to allow follow-on forces to exploit the gap into Atropia. Our forces as scattered and are slowly moving into defensive positions. Your company is on a rotation near the border - it was your last week before going home for a few weeks of R&R, but you're first and only line of defense against the Donovian wave.
Your tank company is currently staged behind Hill 474 and the Samagen Heights. You have access to Highway 4 which runs across the border and directly to Badakhashon. It is the most likely avenue in which the 80th Division will attack through. You also have a platoon of Brigade scouts set in a screen across the border. They are lightly equipped but have exceptional observation posts that will provide you with plenty of early warning.
We expect the 80th Division to attack with the 801 Mechanized Brigade as the first echelon. However, we also expect the 801st to be augmented with tanks from the 804th Tank Brigade and artillery from 805th Field Artillery Brigade. Behind the 801st will follow the 802nd and 803rd Mechanized Brigades.
II. MISSION
Defend along Highway 4 for two hours - allow friendly forces to reach defensive positions to your rear area (main battle area) and prevent the enemy from achieving decisive success along the border.
III. EXECUTION
Array your company at defensive positions to intercept the enemy that will approach along Highway 4. Brigade scouts will provide early warning to the east. However, we shouldn't expect any further assets to enter our area of operations. Hold your position for two hours to allow friendly forces to move into their defensive battle positions to our rear (west) and then be prepared to retrograde from the area.
IV. SERVICE & SUPPORT
All units are fully resupplied, and the company maintains two organic resupply vehicles as well as our medical evacuation vehicle.
V. SIGNALS
Friendly ID: On
Map Contacts: Enabled
Overhead View: On
228 downloads
-

Utah Beach 44
By Apocalypse 31 in 4.1+ Map Packages
A 4.1+ map package that depicts the area around Utah Beach in 1944.
Original Height Map was made available by Dark Angel
To download the map, enter: 0e176f0d-3be6-40c3-8ee4-93e0819bf419 into Steel Beasts Map Tools. Scenarios that use this map should auto prompt end users to download this map if needed.
153 downloads
(1 review)0 comments
Updated
-
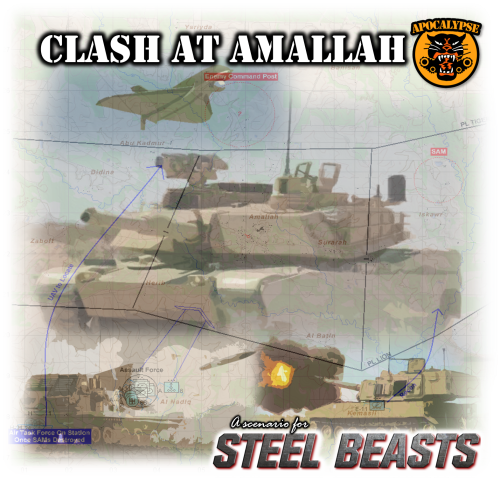
Clash at Amallah
By Apocalypse 31 in Company
Combat Power
2x ASLAV-25
2x Centauro
8x M1A2
4x M2 ODS
1x UAV
2x UH60 (w/ dismounts)
I. Situation
Enemy forces defending the town of Amallah with an armored company (T-72M4 and BMP-3) in a hasty defense. On the eastern flank is a known SAM (MANPAD) site that was revealed to us by Human Intelligence sources in the area. It is defended by dismounted forces and light trucks, and is using aggressive roving patrols. Additionally, if the enemy detects an armored attack on the SAM site, it will most likely launch a counter-attack with the Brigade Reserve Company (T-72) to protect its high-value asset. We have also detected a C2 node - an enemy Command Post that is directing the fight from north of Amallah. We believe this will be a vulnerable target for our UAV and long-range fires if we can first neutralize/destroy the SAM site. The enemy maintains a small armored reserve somewhere north of Amallah that will be employed to prevent the town from falling into our hands, or to defend the SAM site. The enemy also maintains a platoon of 122mm artillery, located somewhere to the north.
II. Mission: Attack to seize the town of Amallah
III. Execution
Concept. Amallah must be cleared - however, we must set the conditions for a successful attack. First, we will locate and destroy a known SAM site in the east using a recon force - this site is providing protection against friendly air assets. These SAMs are incredibly important for the enemy - if they detect our armored vehicles in the area, then we can expect an enemy armored counter-attack against us. Once we have destroyed the SAMs, then our friendly UAV will be cleared on station. Use the UAV to locate the enemy command post, in a suspected position to the north of Amallah. You will have a precision-strike capability with Guided Multiple-Launch Rocket system (GMLR) and 15mm artillery support. Once the SAM site and HQ position have been destroyed then A CO armor will be released for the attack on Amallah.
Key Tasks
1. Locate and Destroy SAM Site (10)
2. Locate and Destroy Enemy HQ (10)
3. Clear enemy from Amallah (30)
4. Preserve Combat Power (50)
Fires
4x 120mm Mortars (organic)
6x 155mm Guns (direct support for enemy HQ)
12x Rockets (direct support for enemy HQ)
IV. Support. Organic medical and resupply assets
V. Signals
Map Contacts: Enabled
Friendly ID: ON
Overhead View: On
197 downloads
- cooperative
- singleplayer
- (and 5 more)
-

Ice Burn
By Apocalypse 31 in Company
Combat Power
8x Stryker Dragoon (DF30/Proxy)
4x Stryker MGS (Centauro/proxy)
4x M1A2
I. SITUATION
a. Enemy. Enemy forces are defending the area with a mechanized infantry company (BMP3) supported by a platoon of T90 tanks and a motorized recon platoon. The enemy has positioned two mechanized platoons foward, defending crossing sites at Novahorsk and Gliwek and two platoons remain near the town of Bojnik. We expect to see motor recon units conducing roving patrols on the flanks and near the Anizu hills, to provide coverage between the disruption forces and the main body in Bojnik. We expect to see tanks supporting the main defense at Bojnik, however, they may reinforce a crossing site if necessary.
b. Friendly. Friendly forces consist of a Stryker Recon Troop supported by a platoon of tanks. Weather is keeping our aircraft grounded, so don't expect any support. The poor weather conditions are also slowing our follow-on forces, so we must seize that critical crossroads junction in Bojnik.
II. MISSION: Attack to clear enemy forces from the town of Bojnik; this will allow follow-on forces ease of movement across the road network.
III. EXECUTION
Tasks
a. Clear Bojnik (60)
b. Preseve Combat Power for follow-on operations (40)
Fires:
155mm are allocated as direct support (216 HE/216 SMK)
IV. SUSTAINMENT. Organic medical and supply assets are organic to your Troop
V. SIGNALS
Friendly ID: On
Map Updates: Enabled
Overhead View: On
239 downloads
(4 reviews)0 comments
Updated
-

Canadian C2 Desert Skin
By Apocalypse 31 in Leopard 1
Full credits to dejawolf for posting the template file for the Leopard 1A5.
I altered the base color and added more refinement to the 'dust'.
Installation: Drop both files into the following directory
\Documents\eSim Games\Steel Beasts\mods\textures\desert\ca
31 downloads
- leopard 1a5
- c2 mexas
- (and 1 more)
(0 reviews)0 comments
Submitted
-

Operation Pathfinder
By Apocalypse 31 in Company
Combat Power:
3x3 CR2 Platoons
2x2 Recon Section (Pizzaro/proxy)
I. Situation
Friendly forces are currently set to the east of Imarat, postured to attack to seize key terrain that will enable follow-on forces a swift transition through the area, along Highway 5 and Highway 2. We have detected a reinforced enemy mechanized infantry company defending the area, with BMP-3, T-90 tanks, and a truck-mounted scout platoon forward. We have detected enemy scouts operating between PL BRONZE and PL PLATINUM, with small teams and ATGM trucks, and we suspect platoon-sized disruption forces to be positioned between PL SILVER and PL BRONZE, with their main defensive force around the town of Chaman.
II. Mission: Attack to seize OBJ BULL no later than H+90 minutes to enable follow-on forces freedom of movement.
III. Execution
a. Seize OBJ BULL (60)
b. Preseve Combat Power for follow-on operations (40)
Fires: 155mm are allocated as direct support (288 HE/240 SMK)
IV. Support. Organic medical and supply assets are on hand
V. Signal
Friendly ID: On
Map Updates: Enabled
Overhead View: On
347 downloads
- cooperative
- singleplayer
- (and 6 more)
(2 reviews)0 comments
Updated
-

Plug The Gap
By Apocalypse 31 in Batallion
Combat Power
9x Tank PLT (Leopard C2)
1x LAV PLT (Infantry)
I. SITUATION
a. Enemy. The enemy has quickly assembled combat power for an immediate attack across the international boundary. We are expecting a mechanized infantry battalion (BMP-1) with T-62 tank support to smash through the border crossing of Al Diraj within the next 15 minutes. The enemy is continuing to prepare for follow-on attacks at a staging site that we have identified to the south.
b. Friendly. This attack has caught us completely by surprise and combat power in the area is extremely limited. A light infantry company from Princess Patricia's Canadian Light Infantry (PPCL) is staged and loaded at the FARP to the north and prepared to move. A armored regiment from Lord Strathcona's Horse has just arrived and are prepared to attack.
II. MISSION. Defeat the enemy attack and perform a counter-attack to prevent further attacks from occuring in the area
III. EXECUTION
Tasks
1. Hold the enemy - prevent a total breakthrough of the area
2. If necessary - clear Al Diraj and re-establish the border
3. Destroy the enemy forces in the marked staging area to prevent further attacks
Fires.
12x 155mm have arrived in sector and are directly supporting your efforts
Aviation
A flight of AH-64's are en route but may be diverted for operational reasons.
IV. SUPPORT
a. Organic supply trucks
b. There is no FARP in sector
V. SIGNALS
Friendly ID: On
Map Updates: Enabled
Overhead View: On
V. SIGNALS
Friendly ID: On
Map Updates: Enabled
Overhead View: On
320 downloads
(1 review)0 comments
Updated
-

Guardian Angels
By Apocalypse 31 in Company
Combat Power
2x PLT Challenger 2
1x PLT Ulan (Upgraded Warrior, squint hard)
I. SITUATION
Friendly forces from the 12th Armoured Regiment are are preparing to conduct their attack along Highway 252 to seize critical bridges at Großenmarpe. The enemy in Großenmarpe is estimated as Battalion-strength, however, we are only expecting a MECH COY in our sector which is serving as a flank protection force. We anticipate encountering enemy recon forces between Phase Line ARRAN and BADGER, with the most probably enemy defensive positions near the town of Kleinenmarpe (between PL BADGER and CARLOW). Friendly scouts made contact in Bruntrup last night but were forced to retrograde after taking casualties and direct fire from enemy armor.
Objective Guardian is key terrain for supporting Großenmarpe; the enemy Brigade is in a position to support the defenses at Großenmarpe and retain those critical bridges, but their axis for reinforcing passes through Objective Guardian. Therefore we must hold Objective Guardian to protect the flank of the 12th Armoured and prevent additional enemy forces from reinforcing Großenmarpe.
II. MISSION. D Squadron attacks to seize OBJ GUARDIAN not later than D+90 minutes to protect the flanks of the 12th Armoured Regiment and support an attack at Großenmarpe.
III. EXECUTION
Key Tasks
-Clear enemy forces between PL ARRAN and CARLOW.
-Seize OBJ GUARDIAN
-Defend OBJ Guardian and prevent enemy reinforcements from passing into Großenmarpe.
Fires
4x120mm Mortars
IV SERVICE AND SUPPORT. Organic resupply and medical assets.
V. SIGNALS
Friendly ID: On
Map Contacts: Enabled
Overhead View: On
180 downloads
- challenger 2
- ulan
- (and 6 more)
(1 review)0 comments
Updated
-

Dragoon Blaze
By Apocalypse 31 in Company
Combat Power
6x DF30 (w/ Scout Teams)
2x Centauro
2x M1A2
I. SITUATION
a. Enemy. Enemy forces are defending the area with a Mechanized Company; three platoons of BMP-3 supported by a T-90 tank platoon. We expect a truck-mounted scout platoon operating between Phase Line AXE and Phase Line BLADE, with the main enemy defense positioned between PL BLADE and PL CUTLASS. The enemy has positioned a battery of SA-19s near the town of Datsk in order to protect their logistics node that is established the town of Zvodra.
b. Friendly. A Stryker Recon Troop is positioned forward, and is being supported by a section of M1A2 tanks. A US Combined Arms Battalion is following and will pass along Highway 8 as they continue the attack to the north.
II. MISSION. Attack to destroy the enemy logistics node near Zvodra
III. EXECUTION
Concept. Attack to clear enemy armor and air defense
Tasks
1. Clear enemy between PL BLADE and PL CUTLASS so follow on forces can pass through the area unhindered
2. Destroy enemy Air Defense Artillery north of PL BLADE to enabled aviation assets to operate in the are freely.
3. Destroy the Enemy Support Area with Aviation and Artillery Assets
Fires
2x 120mm Mortars
4x 155mm Guns (216 HE / 180 SMK)
2x MLRS (en route)
6x 155mm Guns (en route)
Aviation
2x AH64 will arrive once the area is clear of enemy air defense artillery
IV. SUPPORT
Assets: Resupply & Medical
V. SIGNALS
Friendly ID: On
Map Contacts: Enabled
Overhead View: On
197 downloads
(2 reviews)0 comments
Updated