Warrior

Warrior (FV 510): Infantry Combat Vehicle
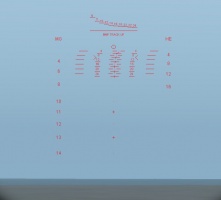
Statistics
Main Gun: 30mm L21A1 RARDEN auto-cannon
Ammunition Stowage: 3 ready/225 stowed
Default Ammunition 'A': 3/111 L14A3 APDS-T , 0/114 L13A2 HE-T
Coaxial machine gun: 7.62 mm L94A1 EX-34 chain-gun
Ammunition Stowage: 200 ready/2000 stowed
Default Ammunition: 200/2000 7.62mm NATO
Grenade Dischargers: Grenades
Ammunition Stowage: 8 ready/8 stowed*
Default Ammunition: 8/8 Smoke
- The smoke grenade count represents single rounds fired as salvos using the left/right dischargers.
Armour protection:
Frontal Turret Armour: Light, Steel + Applique. Protected against 30mm AP
Frontal Hull Armour: Light, Aluminum + Applique. Protected against 30mm AP
Combat Weight: 25.4 tonnes
Length: 6.6m
Width: 3.23m
Height: 2.8m
Engine Power: 550hp Perkins Condor V-8 diesel
Top Speed: 75kph (On-Road)
General
Originally intended to replace the older FV430 series of armoured personnel carriers, the FV510 Warrior is a full-tracked infantry combat vehicle (ICV) in service with the UK and Kuwaiti militaries. Also known as the MCV-80, the Warrior began life as a series of in-house studies conducted by the UK Ministry of Defense (MoD) during the late 1960's and early 1970's. Further competitive studies undertaken between 1972 and 1978 resulted in the choice of GKN Defense (later Alvis Vehicles and currently BAE Systems Land and Armaments) for final development. Entering UK service in 1986, a total of 789 vehicles were constructed for the British Army before production ended in 1995.
The Warrior is equipped with a two-man GKN Sankey turret, armed with a unstabilized 30mm L21A1 RARDEN auto-cannon, a 7.62mm coaxial L94A1 EX-34 chain-gun, and two sets of four smoke grenade launchers on either side of the turret. The main gun is fed by three-round “clips”, replaced from the right as needed by the vehicle commander. Ready magazine capacity is normally six rounds, but due to limitations within the Steel Beasts engine, this is reduced to three rounds, but with faster than usual reload times. Unlike the Scimitar and Scorpion, power traverse is provided, but is very coarse, and is best used for broad turret movements. Manual traverse controls should be used for fine adjustments and for tracking moving targets. Elevation controls remain manual only. It should be noted that this arrangement is not seen as detrimental, since the Warrior's battlefield role is more akin to a heavy APC with good support capability rather than a true IFV intended to carry its infantry on to an objective.
The modeled version is the standard section vehicle outfitted with passive applique armour (see below). Crew positions match the modeled version with a 1x image intensification sight for the driver, and Pilkington Optronics Raven day/night sights for both the commander and gunner. Day optics provide magnified views of x1 and x8, while the night image intensifier has a x2 wide and x6 narrow field of view. As with all British combat vehicles, the Warrior is equipped to operate in an NBC environment for extended periods.
The addon passive applique armour is an obscure subject. Most attribute this to an Operation Granby (1st Gulf War) upgrade, but the vehicle was designed to support the addon armor package and the passive applique armour has been referred to as the "wartime kit", which was intended to be used in all active operations. Like the addon armour package (ROMER) for the Challenger tank, the addon armour was not utilized in peacetime due to the strain it placed on the vehicle's suspension and added fuel consumption costs. This Warrior's addon armour package seems to have been available for use before Operation Granby and so would likely have been available for use against the Soviet Union in a Cold War gone hot situation in 1987 and onwards. It seems that due to the fact that the Warrior's first active operation was Operation Granby, then this is also why the addon armour package was utilized for the first time.
The infantry compliment for the Warrior is 6 dismounts, equipped with 3 M74A4 LAW anti-armour weapons, an FN MAG, and 5.56mm rifles.
Although intended to completely replace the FV430 series APCs, only 1042 Warriors were produced (including all variants), forcing the FV430 family to soldier on in a variety of roles. Beyond British service a desertized version the Warrior was exported to Kuwait in 1993 under the rubric “Desert Warrior” equipped with a version of the 25mm armed Delco turret found on the LAV-25 modified to carry two single missile TOW launchers on either side of the turret.
Thermal Signature


Crew Positions
Tank Commander's Position F7

In Steel Beasts the tank commander's (TC) position on the Warrior is crew-able, but only partially modeled. The TC's position is accessed by pressing F7.
From this position the user can raise and lower their perspective (and exposure level) by holding the Q key (to go up) and the Z key (to go down). The TC can also button or unbutton (close and open the TC's hatch) by pressing the B key (toggle). While unbuttoned, the TC may also wish to use binoculars to get a closer view on a distant area by pressing the N key (toggle).
Gunner's Primary Sight Extension (GPSE)
Unlike other western AFVs, the Warrior has no GPSE per se, but instead equips the commander with a separate Pilkington Optronics Raven day/night sight. Accessed via the gun sight view key (F2), this offers the same field of view(s) and ballistic reticle as the gunner's sight for both day and low-light operations. Note that the Warrior commander lacks any method to move the gun or override the gunner.
TC's vision block view

On some occasions the TC may need to look around the vehicle without having to spin the turret and without having to expose himself to hostile fire. The vision block view allows the TC to remain safely inside the vehicle and quickly scan around for close threats, and is most useful when enemy infantry are in the immediate area. The Warrior commander has five vision blocks, which cover the vehicle's right side and rear, and may be accessed by pressing F4.
Once in the vision block view, the mouse or joystick can be used to quickly and seamlessly pan the TC's view from vision block to vision block, allowing him to scan around the vehicle. While the vision block view completely protects the TC from hostile fire, it does have an extremely limited field of view and offers no magnification.
Key listing for the Warrior's TC's position
General Commands:
TAB: Pop smoke. Instructs the gunner to launch smoke grenades to deploy a smoke screen in the direction that the turret is facing. Useful for breaking up enemy LRF or completely obscuring your vehicle against a non thermal sight equipped threat.
Q: Raise position in hatch. Moves the TC's view and exposure level up in the hatch.
Z: Lower position in hatch. Moves the TC's view and exposure level down in the hatch.
B: Button and unbutton the hatch (toggle). This is used to close and open the hatch.
SHIFT + SPACE: Order the gunner to “Fire and Adjust”.
LEFT ARROW / RIGHT ARROW: Face left / face right. When in the TC's eye view F1, pressing these keys will cause the TC to face to the left or right of the main gun (turret).
UP ARROW / DOWN ARROW: When in the TC's eye view F1, pressing these keys will cause the TC to face in the direction of or to the rear of the gun (turret).
Driver related commands:
SHIFT + BACKSPACE: Shut down / start up engine (toggle). Orders the driver to shut off or start up the engine. If the TC is a platoon leader then it orders the platoon to execute a "short count" and simultaneously shut down or start up their engines.
W: Driver, move out. Instructs the driver to move forward (press again for increased speed.
S: Driver, stop. Instructs the driver to stop.
X: Driver, backup. Instructs the driver to reverse.
A: Driver, go left. Instructs the driver to go left (hold the key).
D: Driver, go right. Instructs the driver to go right (hold the key).
Gunner related commands:
SPACE BAR: Fire. Orders the gunner to fire at a target he is looking at.
H: Hold fire. Orders the gunner to hold fire. If the TC is a platoon leader then it will also order the platoon to hold fire.
F: Fire at will. Orders the gunner to fire at will. If the TC is a platoon leader then it will also order the platoon to fire at will.
E: Engage. Orders the gunner to engage, and instructs the driver to take up a battle position. If the TC is a platoon leader then it orders the platoon to engage and take up a battle position in the direction of the user's view.
M: Coax / Main gun (toggle). Orders the gunner to toggle between the main gun and coax to engage targets.
SHIFT + LEFT ARROW: Gunner, scan left. Orders the gunner to put move the turret approximately 45 degrees to the left and scan for targets.
SHIFT + RIGHT ARROW: Gunner, scan right. Orders the gunner to put move the turret approximately 45 degrees to the right and scan for targets.
SHIFT + UP ARROW: Gunner, scan front. Orders the gunner to put the gun over the front and scan for targets.
INSERT: Fire, fire (ammo type 1, usually sabot/KE). Switches the next three round clip loaded by the commander to this ammo type.
DELETE: Fire, fire (ammo type 2, usually HE). Switches the next three round clip loaded by the commander to this ammo type.
SHIFT + PAGE DOWN: Reload all. Orders the tank crew to reload all weapons systems.
Gunner's Position F6

In Steel Beasts the gunner's position on the Warrior fully crew-able but only partially modeled. The gunner's position is accessed by pressing F6.
From this position the user can raise and lower their perspective (and exposure level) by holding the Q key (to go up) and the Z key (to go down). The gunner can also button or unbutton (close and open the gunner's hatch) by pressing the B key (toggle). While unbuttoned, the gunner may also wish to use binoculars to get a closer view on a distant area by pressing the N key (toggle)).
Gunner's Primary Sight (GPS)
The gunner's primary sight (GPS) is the primary sight the gunner utilizes to engage and destroy targets. The GPS view is accessed by pressing F2.

On the Warrior this is the Pilkington Optronics Raven day/night sight. Although the sight normally provides both a x1 wide and x8 narrow field of view, as modeled the sight's magnification is fixed at 8x.
Sight Symbology
In the GPS sight you will see a set of lines, numbers, and symbols: these are referred to as the gun sight symbology.

GPS sight, aiming reticle
GPS sight, aiming reticle illuminated


The GPS main gun aiming reticle is used for aiming at the target and is fairly simple to understand. At the top is a left to right descending stadia scale which is used to bracket a target and determine its range. The numbers at the top of this scale represent the range to the target in hundreds of meters. Below the horizontal stadia scale are a series of fine dots, horizontal lines, small vertically aligned crosses, and numbered range scales. The range scales are labeled from left to right MG and HE, with the two small central scales designated for AP rounds. The central vertical line of aiming dots/crosses directly correspond to all three scales and these serve as the aimpoints for all stationary targets. Additionally, a circular boresight point is provided above the sight gradations. As shown above, the sight's reticle may be illuminated red for use in low-light conditions or to provide contrast. Pressing the R key toggles the illumination on or off.
IR Sight
As currently modeled, the Warrior lacks a thermal sight, but does have an IR sight as part of the GPS assembly. This image intensifier is of very high quality, with x2 and x6 fields of view which allows for accurate target identification out to 800m, and engagement ranges beyond 1000m under most low-light conditions.

IR sight, 2x wide field of view

IR sight, 6x view, enemy IFV at ~800 meters


As seen above, the IR sight uses a somewhat different reticle compared to the day sight, and lacks any aids for ranging targets. The IR sight may be accessed by pressing F3, but will not function in daylight.
Turret Controls
As noted under the description above power traverse is available for gross turret movements, using either joystick or mouse, but elevation controls are manual and manual traverse should be used for fine horizontal gun movements. The default manual movement keys are UP ARROW / DOWN ARROW for elevation and depression respectively, and LEFT ARROW / RIGHT ARROW for left and right traverse. Tapping these keys replicate using the manual hand cranks, and tapping the keys quicker results in faster movement. As with the actual vehicle, the traverse crank has two gear ranges: high for bold turret movements, and a low range for tracking and fine turret movements. The O key toggles between these ranges.
Engaging Targets
Engaging targets with the GPS is not an exact science. It can require several rounds, a good deal of estimation, and "Kentucky windage" before you hit a moving the target, but stationary targets should be relatively easy to hit if the process is done correctly. The basic process to engage a target is to estimate the range to the target, select the proper ammunition scale, engage the target, make adjustments, and reengage if necessary.
Choking the Target (Ranging)
The first thing you must do is "choke" the target. Choking the target is the term used to estimate range to a target by using the stadia scale at the top of the sight. As mentioned, the numbers on the scale represent hundreds of meters. When estimating range to a target, the target is put in between the long horizontal line and the stepped lines above it (the lines just below the numbers). In the case of a fully exposed target, the bottom line is placed on the bottom of the vehicle (where the tracks touch the ground) and the horizontal dash is placed at the top of the vehicle's turret. In the case where only the turret of a target is visible, some degree of estimation will be required.

In the above image, a fully exposed BMP is choked so the target is placed within the scale at the increment in which it most fully fills the top and bottom of the scale; in this case the scale marked "12" so the target is approximately 1200m away. It is important to remember that the stadia scale is used to determine average enemy APC/IFV sized targets. For larger or smaller vehicles (such as tanks or trucks) a little bit of guess work may be necessary.
Firing
Once the range is estimated to the target, elevate the sight so that the appropriate range numbers to the left or right of the proper vertical scales are even with the target in the sight. Next, if the target is stationary, align the target with the center of the proper sighting point.

Continuing with the example, the target's range was estimated at 1200m and the target is stationary. The sight is elevated so that the target is even with the small "12" to the left and right side of the central aiming points, and the appropriate aiming dot/cross is centered on the target. Once this is done, you are now ready to engage the target. The L21A1 RARDEN auto-cannon has two rates of fire (ROF): single-shot and burst. Pressing the PAGE UP key toggles between the ROFs. Note that when fired, the gun will jump slightly upward and to the right. Continued firing will shift the gun further in this direction, therefore the sight must be realigned after every one or two shots.
Lead

The most important thing to realize is that the Warrior lacks an FCS and therefore does NOT induce lead. Lead is the term used to refer to putting a gun in front of a target which is moving perpendicular to your vantage point. When you lead a target, you essentially need to fire in front of target at the point in which the round and target will meet. Since the Warrior's FCS does not calculate lead, then the gunner must estimate and apply lead himself, and he does this with the use of the small horizontal line and caret markers to the left and right of the central aiming points, and with a bit of skill.
Reengage
In the event that you miss the target, you should relay on the original aiming point, then simply adjust the sight in relation to where the round hit and walk it into the target. You should not waste valuable time estimating the range to the target again unless the target is rapidly moving towards or away from you.
Gunner's Auxiliary Sight (GAS)

Unlike most western "tanks", the Warrior does NOT have a true auxiliary sight, the backup daylight gun sight being the commander's Raven day/night sight.
Gunner's Vision Blocks
The gunner has five vision blocks, which cover the vehicle's left side and rear, and may be accessed by pressing F4 and using the joystick or mouse to move from block to block.
Key listing for the Warrior gunner's position
Weapon system commands:
SPACE BAR: Fire selected weapon. Fires either the main gun or coax (selection dependent, see below).
M: Switches between gun and coax (Toggle).
LEFT ARROW / RIGHT ARROW: Manual traverse. Tap to traverse the turret using the manual hand crank. Tap the keys quicker to traverse the turret faster.
UP ARROW / DOWN ARROW: Manual elevation. Tap to elevate the main gun using the manual hand crank. Tap the keys quicker to elevate the main gun faster.
O: Toggle between high/low traverse rate.
PAGE UP: Switch between single and burst rate of fire (Toggle).
Tank commander related commands:
T: Identified! Tells the TC that you have located a target and that you are going to engage it. Essentially it tells the AI TC to leave you alone while you engage and forbids the AI from guiding you to another target. Use at your own risk.
I: I can't see it! Tells the TC that you cannot see a target or the one he is commanding you to engage. Essentially it tells the AI TC to guide you on to a target that it wants you to engage.
Driver related commands:
W: Driver, move out. Instructs the driver to move forward (press again for increased speed.
S: Driver, stop. Instructs the driver to stop.
X: Driver, backup. Instructs the driver to reverse.
Driver's Position F9
_drivers_view_buttoned.jpg)
In Steel Beasts the driver's position on the Warrior is fully crew-able but partially modeled. Currently there is no 3D view for the driver but there is a driver position view which has an image of the driver's hatch. The driver's position is accessed by pressing F9.